© 2025 Messer Cutting Systems, Inc.

Choosing a Solar Power System For Rv is not simply a matter of buying the largest panel available. It requires practical judgment, honest measurements, and a clear understanding of how you travel. A weekend camper may need a different setup from someone living off-grid for weeks. Your refrigerator, lights, water pump, laptop, and inverter can quietly consume more energy than expected.
RV solar educator Will Prowse offers a useful principle: “Solar power is all about managing energy.” That idea shapes the ten tips in this guide. Before comparing panels, measure your daily watt-hours. Check your battery chemistry, charging limits, roof space, cable length, and expected sunlight. A shaded campsite can reduce production sharply. Dust matters too.
Small details matter.
A 200-watt panel may sound impressive, yet it cannot replace a weak battery bank or inefficient appliances. A reliable Solar Power System For Rv should balance generation, storage, safety, and future expansion. Use correctly sized cables, suitable fuses, and a charge controller compatible with your battery. Professional installation may be wise when roof wiring or high-current connections exceed your experience.
There is no perfect setup. I have seen owners overspend on panels while ignoring cloudy-weather planning. That mistake deserves reflection. The best system is not always the biggest one. It is the system that matches your habits, budget, climate, and tolerance for conservation. The following tips will help you evaluate those choices with fewer surprises and more confidence.
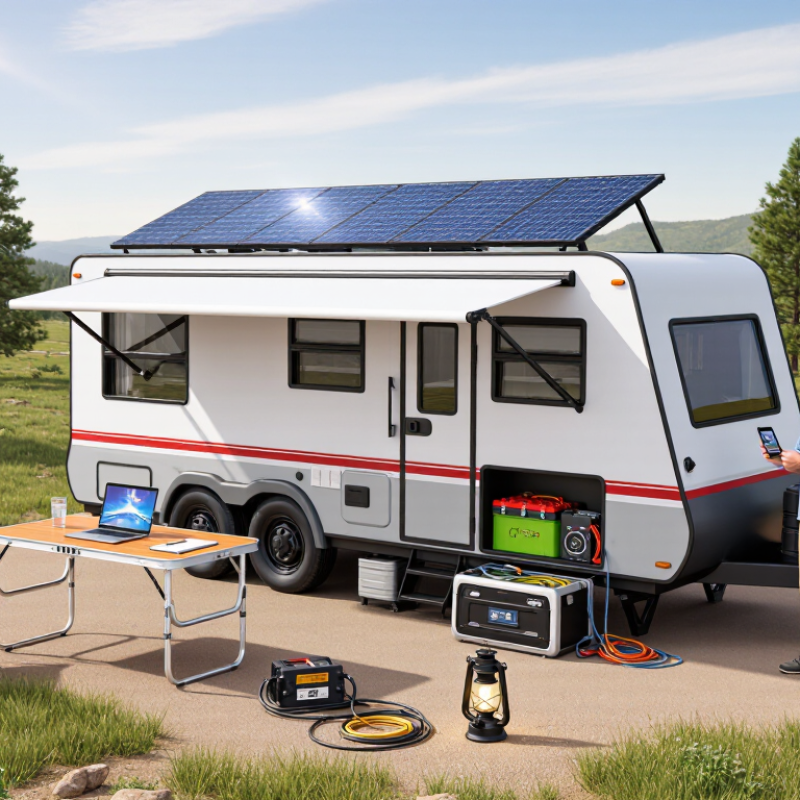
Before choosing a solar power system, measure how your RV actually uses electricity. List every device, its wattage, and daily operating time. Include refrigerators, lights, fans, water pumps, laptops, and medical equipment. Multiply watts by hours to estimate daily watt-hours. Add a safety margin of 20 to 30 percent.
Tip 1: Track power use for three camping days.
Tip 2: Record cloudy-day consumption separately.
Tip 3: Check the battery’s usable capacity, not only its advertised size.
Tip 4: Note whether appliances use direct current or alternating current. Inverters can waste energy.
Tip 5: Identify your quietest and busiest camping routines.
Your goal matters as much as your energy total. A system for occasional lighting differs from one supporting remote work, cooking, or extended stays. Decide whether solar should reduce generator use, provide emergency backup, or support several days off-grid. My first estimate was too optimistic because I ignored morning heating and overnight refrigeration. Real usage can surprise you.
Tip 6: Estimate sunlight by season and location.
Tip 7: Consider roof shade from trees, vents, and air conditioners.
Tip 8: Keep essential loads separate from comforts.
Tip 9: Choose expansion room if your travel habits may change.
Tip 10: Recheck your calculations after one trip.
Perfect predictions are unlikely. Reliable planning comes from measured data, honest assumptions, and enough reserve power for inconvenient weather.
Choosing a solar panel type for an RV starts with the roof, not the advertisement. Rigid monocrystalline panels usually provide strong output in limited space. They also tolerate regular outdoor use better than many lightweight options. Flexible panels weigh less and fit curved roofs, but trapped heat can reduce performance. Their surface may also wear sooner under constant sun and vibration. Portable panels offer useful flexibility when the RV is parked under trees. That convenience matters.
System capacity should come from measured energy use. List each appliance, its wattage, and daily running time. A 60-watt refrigerator running for ten hours uses about 600 watt-hours. Add lights, device charging, a water pump, and inverter losses. Then allow extra capacity for cloudy weather and charging inefficiency. A practical estimate often needs 25–40% more solar output than the basic calculation suggests. Battery capacity must support overnight use, while the charge controller must safely handle the panel array.
Roof measurements can change the entire design. Vents, air conditioners, and shadows may remove more usable space than expected. Check the roof at different times of day. I once treated a shaded corner as productive space; the estimate looked fine on paper but performed poorly in practice. That mistake reinforced a simple lesson: real shade patterns matter more than perfect specifications. Keep wiring short, protect connections from moisture, and leave access for inspection. Small details become expensive when ignored.
| No. | Selection Dimension | Recommended Option | Typical Data or Range | How to Choose |
|---|---|---|---|---|
| 1 | Estimate Daily Energy Consumption | Calculate the energy used by lighting, refrigeration, electronics, ventilation, water pumps, and other devices. Start with a load calculation | A small RV may use approximately 500–1,000 Wh per day, while a larger RV with more appliances may use 1,500–3,000 Wh or more. | List each appliance, its wattage, and daily operating hours. Multiply watts by hours, then add approximately 15–25% for system losses and usage variation. |
| 2 | Choose the Solar Panel Type | Select monocrystalline panels when roof space is limited; consider flexible panels when weight and curved surfaces are important. Efficiency versus weight | Rigid crystalline panels commonly provide about 18–23% module efficiency. Flexible panels are lighter but may have lower durability and heat performance depending on construction. | Use rigid panels for better ventilation, long-term durability, and easier maintenance. Use flexible panels only when their lower weight or installation shape provides a clear advantage. |
| 3 | Match Panel Capacity to Energy Needs | Size the array according to daily energy demand, available sunlight, and the amount of roof space. Avoid undersizing | A 400 W array may produce roughly 1,000–1,600 Wh per day under about 3–5 peak-sun-hours, before accounting for system losses and shading. | For light use, 200–400 W may be suitable. For regular off-grid use, 400–800 W is often more practical. Higher demand may require additional panels or another charging source. |
| 4 | Select the Battery Capacity | Choose a battery bank that can cover nighttime use and provide reserve energy during cloudy periods. Storage matters | A 100 Ah, 12.8 V lithium battery stores approximately 1,280 Wh nominally. A 100 Ah, 12 V lead-acid battery stores approximately 1,200 Wh nominally but generally offers less usable capacity. | Compare usable watt-hours rather than only amp-hours. For multi-day travel without reliable sunlight, increase storage or provide an alternative charging method. |
| 5 | Choose the Charge Controller | Use a controller that supports the battery chemistry and has sufficient voltage and current ratings. MPPT for better harvest | MPPT controllers can generally harvest more energy than PWM controllers when panel voltage is higher than battery voltage or when conditions are cool and variable. | Confirm the controller's maximum photovoltaic voltage, charging current, battery settings, and safety functions. Allow design headroom above the calculated array current. |
| 6 | Check Roof Area and Weight Limits | Measure usable roof space and verify the RV's roof-loading specifications before installation. Space and payload first | A typical rigid RV panel may occupy approximately 1.5–2.2 m² and weigh about 15–25 kg, depending on its power rating and construction. | Keep clearance from vents, air conditioners, roof edges, and service areas. Include the weight of mounting hardware, wiring, controller, and battery in the payload calculation. |
| 7 | Account for Shade and Parking Conditions | Plan for partial shade from trees, roof equipment, nearby vehicles, and low sun angles. Shade reduces output | A small shaded section can reduce the output of a panel string substantially, although bypass diodes and separate solar inputs may reduce the overall impact. | Use multiple panels or independent inputs when roof obstructions are unavoidable. Place the RV where panels receive unobstructed sunlight whenever possible. |
| 8 | Decide Between Fixed and Portable Panels | Combine roof-mounted panels for automatic charging with portable panels when additional output or flexible positioning is needed. Flexibility versus convenience | Fixed panels charge while driving or parked, whereas portable panels can be placed in direct sun when the RV is parked in shade. | Choose portable panels if campsite shade is common or roof space is limited. Consider storage, setup time, cable length, and theft protection. |
| 9 | Size the Inverter for AC Loads | Select an inverter based on both continuous power and short startup surges. Check surge demand | Common RV inverter sizes range from approximately 600 W for light electronics to 2,000 W or more for several higher-power appliances. | Add the running wattage of devices that may operate at the same time. Motors, compressors, and some heating appliances can require substantially higher startup or operating power. |
| 10 | Allow for Weather, Season, and System Losses | Include losses caused by temperature, dust, wiring, battery charging, controller conversion, and cloudy weather. Build in reserve | Real-world daily output is commonly lower than the panel's laboratory-rated capacity. A design factor of approximately 20–30% above the calculated minimum can provide useful operational reserve. | Increase panel capacity when traveling in winter, high latitudes, cloudy regions, or areas with frequent shading. Monitor actual battery state and energy production after installation. |
Choosing a solar system for an RV starts with matching the battery bank to your actual daily loads. List the refrigerator, lights, water pump, inverter, and charging devices. Record their wattage and estimated hours of use. A small notebook helps.
A 200-watt solar array can produce roughly 16.7 charging amps at 12 volts, before system losses. A charge controller should handle that current with practical headroom. For this setup, a 20-amp controller may work, but local conditions can raise output briefly. I prefer extra capacity when the budget allows. Check the controller’s maximum solar voltage, not only its charging current. Series-connected panels can exceed that limit in cold weather. That mistake can damage equipment.
Battery capacity also needs honest planning. Divide daily watt-hours by battery voltage, then account for the battery’s recommended usable capacity. Lead-acid batteries usually need more reserve than many lithium-based systems. Their charging profiles are not interchangeable. The controller must support the battery chemistry and its voltage limits. Add correctly sized fuses near the battery, and use short, suitably thick cables to reduce voltage loss. Keep the bank ventilated when required.
Test the system during a cloudy weekend. Real use reveals more than a sunny afternoon. I once underestimated inverter standby consumption and lost power overnight. That error changed my sizing method. Leave room for winter shading, aging panels, and one extra device you have not bought yet.
Plan the installation location before comparing solar power ratings.
A roof panel needs clear sunlight, but air conditioners, vents, and roof racks can create afternoon shadows. Even a narrow shadow may reduce output noticeably. Measure the available roof area and check its load limit. Leave space for maintenance and avoid blocking emergency exits. I once underestimated cable distance. That mistake increased voltage loss and made routing awkward.
Map the wiring path from the panels to the charge controller, battery, and inverter.
Keep cables short, protected, and supported against vibration. Use cable sizes suitable for the expected current and distance. Install correctly rated fuses or breakers near the battery. Add a disconnect switch where it remains easy to reach. Label positive and negative wires clearly. Polarity errors can damage equipment quickly. Test every connection with a meter before energizing the system.
Safety depends on details that are easy to overlook.
Seal roof penetrations with materials designed for outdoor exposure, not ordinary household tape. Keep battery compartments dry, secure, and ventilated when the battery type requires ventilation. Protect wiring from sharp metal edges with flexible conduit or grommets. Bond and ground components according to local electrical rules. A qualified electrician should inspect unfamiliar work, especially high-current battery circuits. My own checklist still changes after each installation; real RV layouts rarely match the first drawing.
Choosing a solar power system for an RV starts with honest energy measurements. List every load, including a refrigerator, water pump, lights, laptop, and inverter losses. Measure watt-hours over several travel days. Add a 20% reserve, but do not overspend blindly. NREL’s PVWatts documentation uses a default 14% total system loss, covering wiring, temperature, and other factors. Shading can increase losses sharply. A tidy roof layout may still perform poorly under trees.
Compare complete quotes, not panel prices alone. Include mounting hardware, wiring, fuses, a charge controller, battery capacity, and installation labor. Lithium batteries cost more initially, but they usually provide more usable capacity and lower weight. Lead-acid batteries may suit occasional campers. However, they need careful charging and ventilation.
Ask about maintenance intervals, battery replacement costs, and controller warranties. IEA PVPS Task 13 research stresses monitoring and documented system performance. A simple display can reveal gradual faults before a trip.
Leave physical and electrical room for expansion. Choose a controller that accepts additional panel wattage. Install wiring with suitable capacity for future batteries. Keep spare roof space when possible. Avoid designing around one perfect summer day. Winter clouds, dust, and aging batteries will expose weak assumptions. My own calculation would probably be too optimistic without a week of real measurements. The cheapest system can become expensive after one replacement cycle. A slightly larger controller may be the better upgrade.
© 2025 Messer Cutting Systems, Inc.